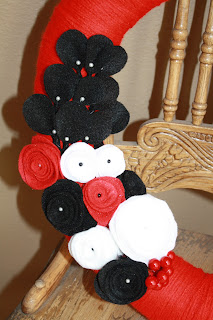
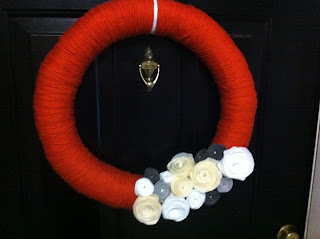
Finally after what feels like a thousand computer problems, I am back! My computer has been such a pain but, I have been keeping myself very busy lately. Of course, all the normal things have kept me occupied, but I have also added a few new things to my life's "to do" list. I will of course touch on all those in future posts, but for now I want to show you my newest DIY project... Yarn wreaths! They are fun, easy, super cute, and easy on the wallet. Those are all pluses for me when it comes to a do it yourself craft. The best part about these wreaths is, the sky is the limit. Once you figure out how to make them, you can pick so many different ways to create them. I decorate my wreaths with felt flowers ( which are also very easy to make). I hope that you all love these as much as I do, and I also hope this tutorial helps unleash your inner DIY diva!
Good Luck and if you have any questions, please don't hesitate to ask.
First here is a list of things you will need to make your wreath:
Straw wreath (I use an 18 inch)
Glue gun or fabric glue
1-2 bundles of yarn
Felt (I buy mine in the pre-cut squares)
Straight pins to attach your flowers
*Any other decorations you want to use
To start your wreath you want to pick a spot and tie a knot with your yarn on the back side of your wreath. Use your thumb and pointer finger to hold the yarn in place, and start wrapping your yarn tightly around the wreath.
Once you get the hang of it... Repeat, Repeat, Repeat! It will be a little time consuming but it will look amazing once you are done. As you can see I chose to use two different types of yarn. All you would need to do is measure, tie off, and restart where you want to. And remember this does not need to be perfect. I think little imperfections make this wreath look very pretty and homemade.
I also wanted to show you how I handle my yarn. I wrap extra yarn around the middle and keep my bundle as neat as I can while I wrap the wreath. When my middle section runs out, I pull more out and re-wrap the middle. I tried other ways but this way just feels more comfortable in my hand.
When you are done wrapping all your yarn, make sure to pull your yarn tight and tie it off on the back side of your wreath. If you feel like it is not tight enough, you can add a little glue to reinforce the yarn.Once you are finished, you can begin the decorating process! (I left two sections of color bigger then all the rest. I like those sections to be a little bigger so all the colors look even after decorating.)
Now... Time for making flowers (my favorite part)!!!!!!!!!!!!!
I use pre-cut felt squares (from Michael's) for most of my flowers. For now, I am going to show you the most common felt flower. I think it looks most like a rose and they are my favorite flower for my wreaths. First of course, decide which color you want and cut a circle out of your felt square (this does NOT have to be perfect).
Next, you'll want to continue cutting the circle in a spiral pattern until you have a long strip ready to be rolled into a flower.
Once you get to the end of your felt and your pretty flower is finished, glue the end of the strip to the bottom of the flower. It will help the flower look finished and hold the flower in place.
Now you will have lots of flowers for your yarn wreath!! I like to use the straight pins to hold the flowers in place, and they double as the middle of the flower as well.
Now you are all done! Yes, this wreath can take a while when you are first learning how to make it, but I think it is well worth it!
* Here is my finished product (which was made for my littler sister, and was UT inspired)!
And here are a couple other wreaths and flowers that I have made...
I really hope you found this post helpful and I also hope it inspires you to want to make more DIY crafts! Happy Crafting everyone!:)
Until Next time,
XOXO


No comments:
Post a Comment